A blinking green light on a garage door sensor usually means the safety beam is not staying steady, which can prevent the door from closing or cause it to reverse. In Winston-Salem, NC, this often happens when the sensor lenses get dirty, the brackets shift out of alignment, wiring loosens, or sunlight interferes with the beam. Even small changes near the opening can trigger inconsistent performance.
This guide breaks down the most common causes of blinking sensor lights and explains the safest solution for each. You will learn what to check first, which signs point to a deeper issue, and when to schedule garage door repair service so your door closes reliably and safely.
Why Is My Garage Door Sensor Green Light Blinking?
A blinking green light usually means the sensors are not maintaining a steady infrared beam across the opening. When that beam drops even for a moment, the opener treats it as an obstruction and may pause, reverse, or refuse to close to ensure safe operation.
What a blinking green garage door sensor light usually indicates
- Unstable indicator lights that flicker, blink, or change between steady and flashing
- Sensor alignment that is slightly off due to bumps, vibration, or loose brackets
- Dirty lenses, moisture film, or spider webs are interfering with the signal
- Loose wiring or weak connections that cause intermittent power or signal loss
- Sunlight glare or reflections that overwhelm the receiver at certain times
- A system response that stops or reverses during closing to prevent unsafe movement
To understand what blinking and light changes usually indicate, read our guide on How to Test a Garage Door Sensor When the Green Light Blinks , which explains what each sensor light pattern means and how to confirm the cause before you start adjustments.
Dirty Lenses, Dust Buildup, Or Debris In The Beam Path
Even when nothing major is in the way, a thin layer of dust can scatter the infrared beam, making the signal unstable. This is extra common when wind blows grit into the opening, or after rainy weather leaves a film behind. A small buildup is easy to miss because it isn’t always obvious until you check up close.
Visual clues pointing to lens buildup
- Look at the sensor lenses for haze, smudges, and stuck-on grime.
- Scan for spider webs near the base of the track area and around the mounting points.
- Confirm the door’s path is clear where the beam travels across the opening.
Cleaning steps that bring the signal back
- Wipe each lens gently with a slightly damp soft cloth, then dry it fully so no streaks remain.
- Clear webs and buildup around the brackets so nothing drifts back into the beam path.
- Test several closing cycles to confirm that the indicator lights remain steady and that the door closes without reversing.
To apply these cleaning steps in the correct order and avoid residue that causes the blinking to return, read our guide on How to Clean a Garage Door Sensor for a Blinking Green Light , which walks through the safest way to clean and recheck the sensors afterward.
Misalignment From Vibration, Bumps, Or Bracket Movement
Sensors can drift out of aim over time, especially if the brackets get bumped by a broom, a bike tire, or storage bins. You might also see this after a season of temperature changes, because hardware can loosen a little and shift. When that happens, the system can almost connect but not quite hold it steady.
Indicators that the sensor’s aim has shifted
- The light changes when the door moves, but it seems fine when the door is stopped.
- One sensor looks slightly tilted compared to the other.
- The door reverses as it shuts, even though the opening appears clear.
Alignment adjustments that hold during door movement
- Realign both sensors so they face each other evenly at the same height.
- Secure the brackets so vibration cannot shift the sensor position again.
- Test several closing cycles to confirm the green light stays steady while the door moves.
To restore alignment correctly and prevent blinking from returning after small bumps, follow our guide on How to Align a Garage Door Sensor With a Blinking Green Light , which shows the safest way to set height, aim, and bracket stability.
Loose Wiring, Pinched Cables, Or Failing Connections
Sometimes the light flashes because the connection is not steady, not because the aim is off. A cable can get pinched by a staple, rubbed by vibration, or tugged where it enters the sensor body. Over time, that can create loose wiring, causing the signal to cut in and out.
Where wiring problems usually show up
- Gently wiggle the wire near the sensor and watch the light behavior.
- Inspect the cable run for tight bends and spots where it could be squeezed.
- Check the terminals at the motor unit for a firm connection.
Connection checks that stop intermittent signal loss
- Shut off power, then reseat each wire connection so it is tight and stable.
- Secure the wire run so it cannot shift during closing and vibration.
- Replace damaged wiring rather than patching, since weak spots often fail again.
This is a smart place to do garage door sensor troubleshooting because unstable wiring can mimic misalignment until the connection is secured, and Chamberlain Group explains how flashing LED indicators at the opener can point to wiring or communication problems between the opener and safety sensors, helping you confirm whether the issue is signal stability rather than sensor alignment.
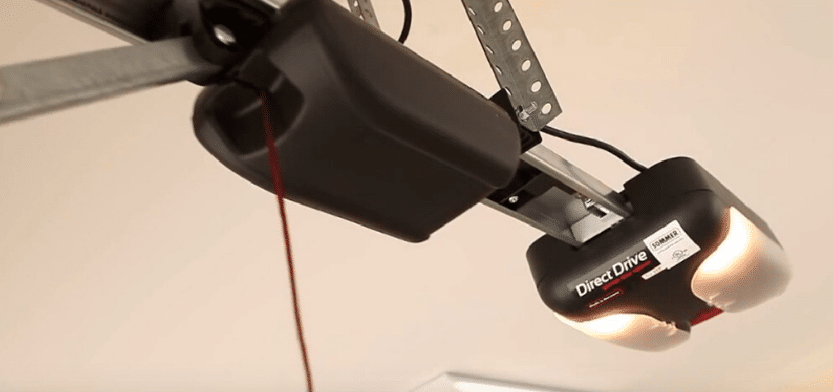
Power Or Logic Issues At The Opener Affecting Sensor Output
If the opener is not supplying steady power to the sensors, the lights can behave unpredictably, even when the sensors are clean and properly aligned. A loose connection at the power outlet, power surges, or an internal control issue can disrupt sensor output and cause inconsistent operation.
Patterns that point to opener power or control issues
- Both sensors are showing unstable lights at the same time
- The door works briefly after a restart, then fails again later
- Light behavior changes after storms or power flickers
Power steps that restore stable sensor output
- Unplug the opener briefly, then plug it back in and test several closing cycles
- Confirm the power outlet supplies steady power and is not controlled by a wall switch
- Stop troubleshooting and schedule service if the issue returns, because deeper electrical problems should not be handled without proper training
If you want to understand why garage door systems are designed to stop or reverse when sensor signals or power become unstable, the U.S. Consumer Product Safety Commission explains how residential operators prioritize safety during electrical or signal issues.
Sunlight Glare, Reflections, Or Environmental Interference
Direct sunlight can hit the receiving sensor, washing out the infrared beam and causing the light to blink and the door to behave inconsistently. Reflections from light-colored vehicles, shiny floors, or nearby storage can create the same glare effect.
Timing clues that confirm sunlight interference
- The problem happens at a specific time of day
- The door works better on cloudy days
- The light flickers more when the sun shines into the opening
Glare reductions that keep the receiver stable
- Shade the receiving sensor, so direct sunlight does not hit it head-on
- Adjust the sensor angle slightly to reduce glare without changing alignment
- Move reflective items away from the beam line near the opening
- Test several closing cycles at the problem time of day to confirm improvement
Repeated glare-related blinking is a good time to schedule a garage door maintenance service, because a technician can confirm stable sensor positioning and consistent closing under changing light conditions.
Sensor Wear, Internal Failure, Or Mismatched Replacements
Over time, sensors can fail due to normal wear, especially when exposed to moisture, dust, and daily vibration. You can also run into trouble if only one sensor is replaced or the new set does not match the opener model.
Symptoms of internal sensor failure
- The light never stays steady for long, even after cleaning and aiming
- The system works only in a tiny sweet spot
- The issue returns quickly after you tighten the hardware
Replacement steps that restore consistent operation
- Replace both sensors as a matched pair that fits your opener model
- Confirm the wiring connections are clean, secure, and not loose at the terminals
- Retest multiple closing cycles to verify steady lights and consistent response
If you are at the point of replacing parts, garage door sensor repair should focus on correct matching rather than trial-and-error swapping, and LiftMaster’s LED troubleshooting documentation shows which blinking patterns indicate sensor failure or compatibility issues.
Safety System Response To Obstructions Or Unsafe Closing Conditions
A garage door system is designed to stop or reverse when the safety beam is blocked or unreliable. When the opener cannot confirm a clear infrared signal, it treats the situation like an obstruction to prevent unsafe closing.
Why does the door refuse to close for safety
- Safety sensors help protect kids, pets, and property near the opening
- A door that sometimes shuts can still be dangerous
- Ignoring inconsistent closing can lead to unexpected reversals or refusal to close
Safety checks that restore normal closing
- Clear items near the base of the opening and along the door’s path
- Clean the sensor lenses and confirm the beam line is not blocked
- Verify alignment and test the reversal response to confirm safe operation
- Schedule service if the signal will not stay steady after basic checks
Ongoing reversals or a refusal to close are good reasons to schedule a full safety inspection, as a technician can verify sensor response, reversal behavior, and safe operation under real closing conditions.
Solutions To Try After You Identify The Cause
After you identify the most likely cause of a blinking sensor light, use these simple steps in order to restore reliable closing and avoid repeat issues:
- Confirm the pattern by watching the indicator lights on both sides during closing
- Clean the sensor lenses first, because buildup is a common trigger
- Restore proper alignment next, since small bracket shifts are easy to miss
- Check wiring and terminal connections to rule out a signal drop from loose wiring
- Do one simple reset at the opener, then retest without repeating resets
- Replace worn parts when needed if the lights will not stabilize after basic checks
A stable garage door system should show steady indicator lights, close smoothly, and reverse immediately when the infrared beam is interrupted by an obstruction.
When Garage Door Sensor Issues Require Professional Service
If cleaning, alignment, and basic wiring checks do not resolve the blinking, professional service is the safest next step, as the garage door system should operate reliably every time.
Signs that professional service is needed
- The door reverses or refuses to close, even after cleaning and alignment
- Indicator lights will not stay steady through multiple closing cycles
- The problem returns quickly after brackets are tightened or sensors are adjusted
- Loose wiring, damaged insulation, or unreliable connections are visible
- The opener behaves inconsistently after a single reset
At this stage, many homeowners search for a garage door sensor near me because repeated adjustments have not solved the issue, and a full system inspection is needed instead of another short-term fix.
What a professional service visit should include
- Sensor alignment stability was checked during door movement
- Verification of a clear signal path with no hidden obstructions
- Inspection of wiring condition and power output at the opener
- Confirmation of safe closing and proper reversal response
Addressing the root cause at this point helps prevent repeat failures and restores dependable operations you can trust every day.
Blinking Green Garage Door Sensor Light Repair in Winston Salem, NC
When a green sensor light keeps blinking, the goal is to restore a steady safety signal so the door closes reliably every time. Identifying the true cause protects the full system, reduces repeat failures, and keeps daily access safe for Winston-Salem homeowners.
Carolina Garage Door provides complete sensor and opener testing to pinpoint the source of blinking lights and restore dependable operation. If the sensor light keeps flashing or the door will not close safely, contact us or give us a call today to schedule service and get reliable closing back.
Frequently Asked Questions

The post How to Test a Garage Door Sensor When the Green Light Blinks first appeared on Carolina Garage Door.